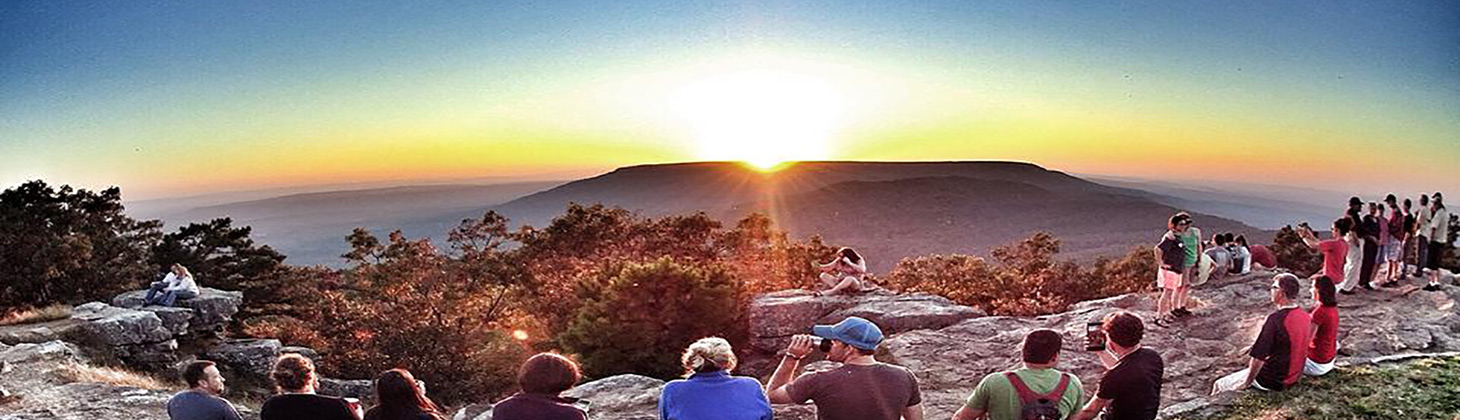
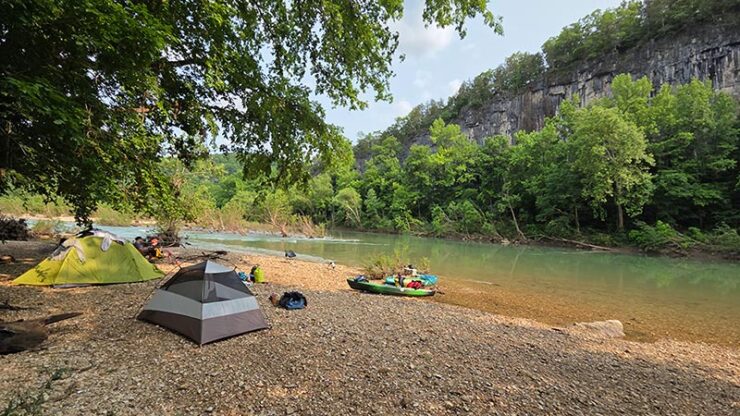
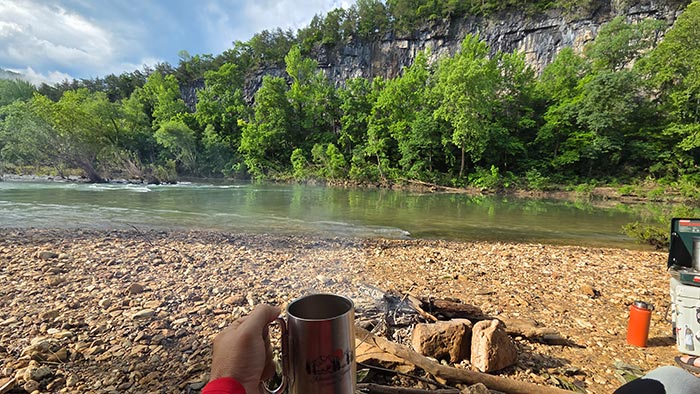
There’s something truly therapeutic about an overnight float trip on the Buffalo National River. The quiet stillness of the evening, and the crackle of a campfire under a canopy of stars. Sleeping to the sounds of water rushing through nearby shoals. A front row view of a towering bluff with the morning sun peeking over its ridge is one of the best ways to enjoy morning coffee. For those seeking a perfect blend of stunning scenery, manageable paddling, and ample camping opportunities, floating Carver to Woolum on the Buffalo River is an ideal choice. This journey offers a fantastic multi-day adventure that showcases the heart of America’s first national river.
Floating Carver to Woolum on the Buffalo River is a classic overnight float through serene forests, rugged bluffs, and calm bends of the Middle Buffalo. Like other overnight floats, it allows you to leave behind the worry of securing a good camp site at the busy NPS campgrounds. Forget the loud campground neighbors and nosy campground hosts. The best camp sites are right next to the water, wherever you choose to stop for the day. And there is no shortage of scenery on this stretch of the Buffalo. A peaceful cruise through the geological wonder known as “The Nars” (the Narrows) is just one of the highlights that’s sure to carve itself into your memory.
Quick Glance
Distance: 15.4 miles
Difficulty: Easy
Carver Access Coordinates: 35.983182, -93.040712
Mt Hersey Access:36.009203, -92.953071
Copper Bluff: 36.00640, -92.94862
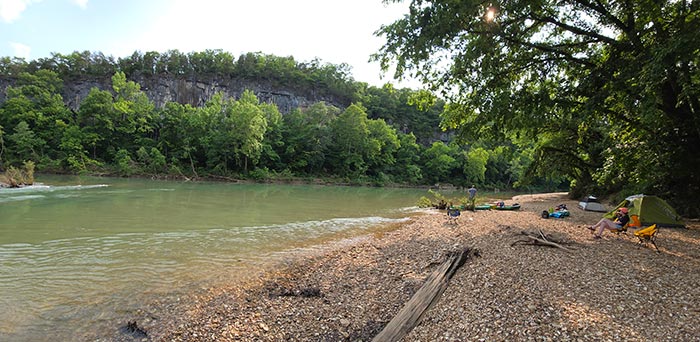
Clair Bluff (our camp): 35.98316, -92.95532
John Reddell Bluff: 35.99191, -92.93689
The Narrows (Nars): 35.96625, -92.90317
Woolum Access(Take-out): 35.970368, -92.886953
(Copy/Paste Coordinates into GPS or Google Maps search bar)
Directions
When floating Carver to Woolum on the Buffalo River, I recommend self-shuttling for anyone that has their own boat. Because South Woolum road is closed (as of 7/10/2025), shuttling between Carver and Woolum will be a little expensive. So for the self-shuttlers, map your way to the community of Pindall on Hwy 65 northwest of St Joe. From Pindall, find North Woolum Rd and head south. It starts off as a paved road but quickly turns into a gravel road. Stay on North Woolum Rd for 8 miles until it ends at Woolum Campground. Leave your shuttle vehicle here. You’ll want a vehicle that can carry your whole group’s boats and gear back to Carver after the float. To get to the put-in, make the long ride back up North Woolum road to Pindall. Turn left on Hwy 65 and drive 6.1 miles. Turn left on Hwy 123 S, and drive for 10.8 miles. The entrance for Carver Campground and access will be on the left. For anyone that needs to rent or values their time more than money, simply map your way to the outfitter of your choice. They’ll take it from there.
What to Expect
The Float
Floating Carver to Woolum on the Buffalo River is a 15.4 mile trip. One option we considered was to drive in to Mt. Hersey and camp there. Then day float Carver to Mt. Hersey one day, and Mt. Hersey to Woolum the next day. But getting to Mt. Hersey and Woolum both involve long drives down gravel roads. And they’re not the smoothest. This makes self-shuttling a time-intensive chore. Plus the road to Mt. Hersey requires crossing two creeks with no bridges. And the access area was a giant mud hole when we stopped there on our float. I wouldn’t attempt driving to Mt. Hersey without 4-wheel drive. So we ditched that option.
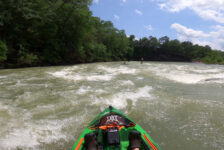
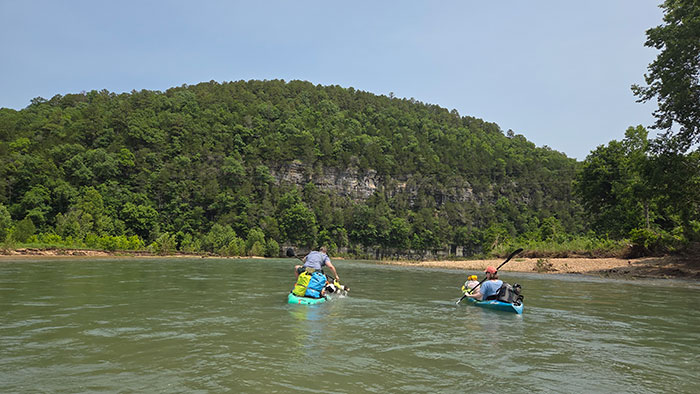
We chose to bypass Mt. Hersey and overnight float from Carver to Woolum. The float actually went faster than we expected. The river was at a great level that weekend ( 5.18 ft on day one. 4.9 ft on day two on the Pruitt gauge), with plenty of flow. We could have easily floated the whole section in one day if we had started early. But that would have been pushing it and probably not taking enough time to enjoy it. Instead, we decided to take our time and enjoy a night on the riverbank. We floated for about 4 hours per day. And we took our time and had plenty of stops. We stopped early to set up camp, and didn’t rush to leave the next morning.
As for difficulty, Carver to Woolum is rated Class I-II. There are a few decent sized rapids and wave trains. One in particular that some people might want to paddle around is right after Clair Bluff. The coordinates for Clair Bluff are listed above and you can see these rapids featured in the video down below. There are also a few turns that require some proactive paddling to avoid trouble. Other than that, most of this section is a smooth, easy float. The fishing seems to be pretty good here. We saw a lot of people fishing for smallmouth bass and doing OK.
Scenery and Features
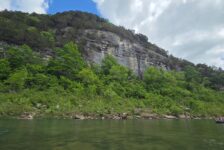
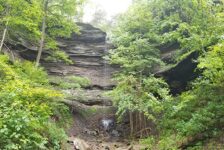
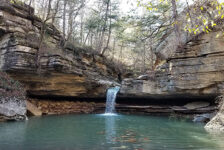
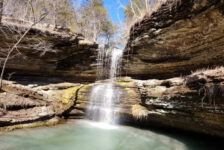
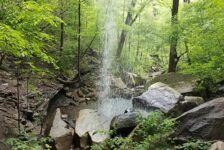
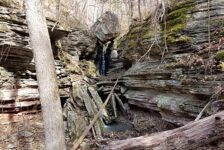
Scenically, the Carver to Woolum stretch is right on par with the rest of the Buffalo River. There are a few spots where there isn’t much to look at but dense wilderness. But then the river treats you to another parade of towering bluffs – some of which are among the most iconic along the entire river. Keep an eye out for interesting rock formations, small caves, and occasional wildlife. We saw one bald eagle on this stretch and several blue herons. The remoteness of this section adds to its charm, offering a true wilderness feel. Large, inviting gravel bars are plentiful, providing ideal spots for camping and swim breaks. I highly recommend Clair Bluff just past Mt Hersey for camping. (see coordinates listed in the Quick Glance section).
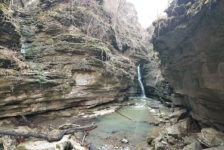
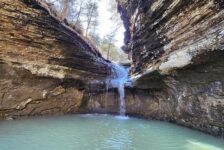
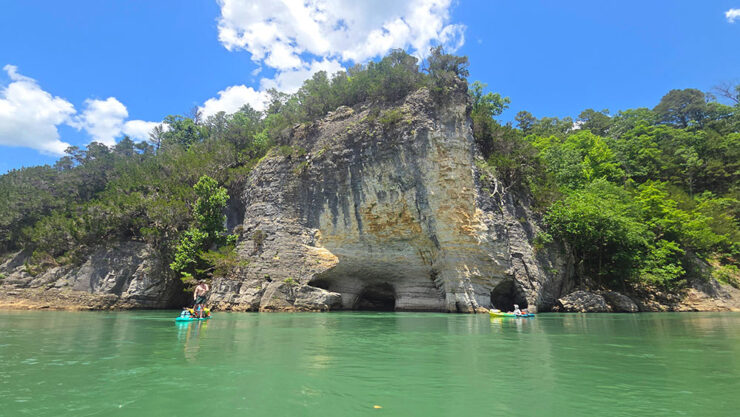
Speaking of iconic bluffs, the highlight of this float is passing through “the Nars” (the Narrows) near the end of the trip. This is the part I was looking forward to the most and it did not disappoint. You’ll know you’re there when you see the narrow ridge rising out of the water on river-right. I’m told there is a way to hike to the top of the narrow ridge from the river, but we couldn’t find it. Although the ridge is very cool, it is not why the area is called The Narrows. Just past the ridge, the river actually does become somewhat narrow as it winds through a series of towering bluffs. Some of these bluff rise straight out of the water while others overlook the river from a distance. At the end of this passageway you’re treated to a view of the popular Skull Bluff. For me, this spot ranks right up there with the best parts of the Upper Buffalo. So much that I dedicated a lot of time to it in the video down below.


Tips For An Overnight Float
There’s nothing quite like watching the sun go down over the river bluffs to the west with a raging campfire. Or waking up with the sunrise over the eastern hills. But an overnight float takes some careful preparation. You don’t just wake up one day and decide to go. It takes a little planning and the proper gear. I get into this in my other overnight float articles here, but I’ll expand on that below. (Yes, I’m recycling the sections below from my Maumee to Rush article. Because I’m efficient like that.)
Gear
Space on your kayak is limited, so it is essential to pack light and efficiently. Weight is also important. The more weight that’s on your boat, the less stable it is. Food and drinks are top priority. Decide how much room you need for that, then figure out from there what gear you can take. Next on the list is either a tent, or hammock and tarp. If it’s still cold, you’ll need a sleeping bag. What cooking supplies do you still have room for? Check our paddling gear list to make sure you’re not forgetting anything. Finally, you will need a large dry bag. Keep dry clothes, a towel, and some food in there.
To save space, you might have to get creative. One thing I do is treat it like an overnight hike. I use my backpacking gear because it is compact and saves space. I used to pack it in my hiking backpack and drop that into a giant trash bag to keep it dry. Now I use the Remote Designs 60 Liter Dry Duffel. I highly recommend finding a bag like this to keep your gear dry and easy to carry. Arrange your gear in your kayak at home to make sure it will fit. If not, coordinate with your group on things you can share so you don’t all bring the same thing. (You only need one camp stove, certain cooking supplies, etc). Hopefully someone in your group will be rocking a canoe or standup paddle board. You can pack a lot in one of those which allows for a few more luxuries. For ideas on arranging gear on your kayak, see my video below.
Packing
If your kayak has any dry storage, try to put as much as you can in there. But anything you’ll use often (sunscreen, coozy, etc) should be left out where you can easily access it. Put the rest in your dry bag and coolers, and strap or bungee those down. The night before the float, I prep as much food as I can. Pre-made foil packs for veggies, potatoes or breakfast saves a lot space and cooking time. Throw those packs on the fire or camp stove for easy cooking and less cleanup.
Food is important. It does you no good if it’s spoiled or waterlogged. So it needs to stay cold and dry until the end. You’ll figure out your system, but here’s how I do it. I have a 3-day cooler packed with frozen water bottles. Large chunks of ice last longer than small ice cubes. These double as drinking water. Day 1 Dinner, Day 2 breakfast and lunch, and drinks go in this cooler. All food and foil packs go into ziploc bags to keep them dry. I do a bottom layer of frozen water bottles. The next layer is Day 2 lunch and breakfast and some bagged ice. A few more frozen water bottles on top of that along with some drinks. And then Day 1 dinner with more bagged ice on top. Pack it completely full, filling all spaces with bagged ice. Less air in the cooler helps your ice last longer. Leave this cooler CLOSED as long as possible. Then pack a small cooler for Day 1 lunch and drinks so you don’t have to open the main cooler. For multi-night trips, look into using dry ice.
Picking a Camp Site
When it’s time to find a camp site, there are some things to keep in mind. First, camping on the river banks is not allowed within 1/2 mile upstream or downstream of a Buffalo River NPS campground. So it’s a good idea to know where those are. Next, I recommend finding a spot where the river is moving fast. Stagnant water attracts mosquitos, and you don’t want that. Plus the sound of rushing water is great for sleeping. Speaking of sleep, If you are hammock camping, look for a spot with trees that can hold your hammock up. And speaking of trees, shade can be pretty handy. So consider which direction the sun will set and rise, and where your shade will be.
Here’s the most important thing, so please read this. Choose a site that allows you to escape to higher ground if the river were to rise overnight. Hopefully you watch the weather and choose a sunny weekend. But sometimes the weather folks get it wrong and storms pop up out of nowhere. Even if the storm isn’t right over you, a storm upriver, can cause the river to rise on you. The Buffalo can rise to dangerous levels very quickly. Yes, it happens. And yes, people have paid dearly for it. With that in mind, island gravel bars in the middle of the river are a bad idea. So is camping next to a large bluff. Being trapped between a rising river and a large bluff is not ideal. So pick a spot where you can get to high ground if necessary.
Plan Your Trip
Floating Time:7-10 hrs depending on flow and number of stops
Cell Service: Little to none/spotty (AT&T)
Dogs Allowed: Yes
Closest Outfitters: Gilbert General Store, Silver Hill Float Service, Buffalo River Outfitters, Buffalo River Canoes, Rio Buffalo
Local outfitters are listed above, but shuttling for this float is expensive due to the drive time. So if you have your own boat, this is a float you might want to self-shuttle. But if your time is more important than the cost, a shuttle might be worth it. Carver is easily accessible right off Hwy 123. But Woolum is a different story. If South Woolum Road is open, it’s an easy drive on a paved road. But as of June 2025, that road is washed out and closed. So the only route is by North Woolum Road. That is a long drive down a gravel road. So driving in to drop off your pick up vehicle takes a while.
As with all floats, it’s important to check river levels before you go. You can do that on American Whitewater or the RiverApp. The minimum recommended level to float Carver to Woolum without dragging is about 4 ft. Anything above 8.5 feet is considered to be too high. Be sure to bring food and drinks for the river and remember – NO GLASS! If you are a new paddler, please read our Paddling page and be sure to check out the Paddling Tips and Gear List on that page. Please do your part to pack out your trash and leave no trace to preserve the pristine beauty of the Buffalo National River.
Cell service here is spotty at best, but there are a few pockets of service here and there. We had service at our camp at Clair Bluff. Just don’t rely on that to coordinate with groups. Plan your meet-up with others before you arrive. If you want to spend more than one night in the area, there are plenty of options for that. The National Park Service has campgrounds at Carver, Ozark, Woolum, Tyler Bend, and several others further up and down the river. Several private campgrounds and RV parks can be found between Jasper and Gilbert. There is also an abundance of cabins and vacation rental properties in the area. But you better book those well ahead of time. They usually are booked at least a month out during the busy float season. For anyone that likes a good post-float dinner, a few dining options can be found in nearby Jasper, St Joe, and Marshall. Floating Carver to Woolum on the Buffalo River is a remarkable overnight trip through the heart of Middle Buffalo country. Plan your float and get ready for star-strewn nights and river mornings you won’t forget.