
The Buffalo National River offers a unique wilderness experience for millions of hikers and paddlers every year. This natural playground of the Ozarks attracts visitors from all over to experience the thrill and beauty of its many scenic floats. But for those seeking ultimate tranquility, solitude and stunning scenery, the Lower Buffalo Wilderness offers a true escape. Floating Rush Landing to the White on the Buffalo River is a 25-mile float that delves into the heart of the Ozarks. This remote stretch of the river provides a glimpse of a world mostly untouched by civilization.
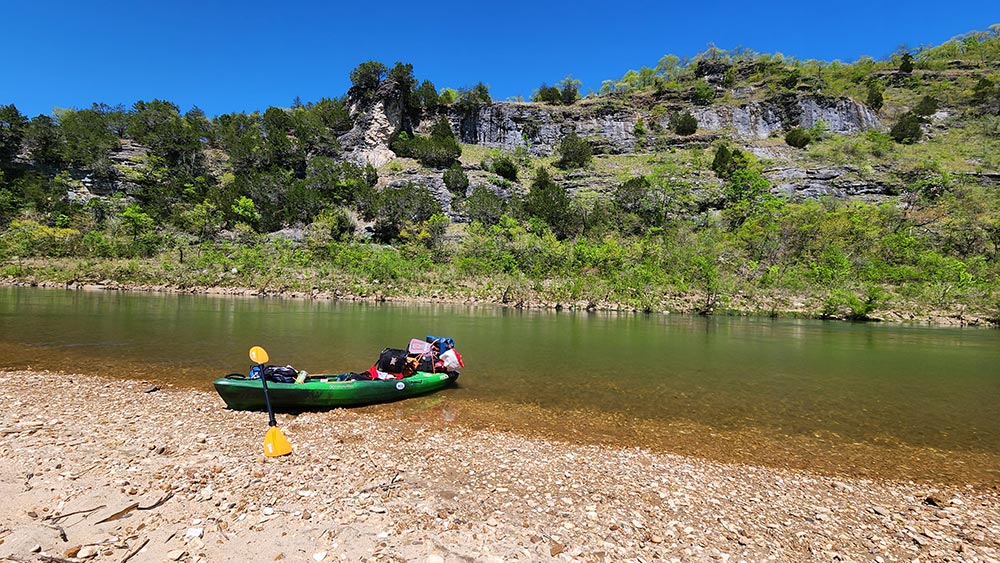
Floating Rush Landing to the White on the Buffalo River has been on my adventure to-do list for years. After bad weather spoiled our plans for this float in 2023, my buddies and I were determined to try again. With careful planning and some help from Crockett’s Canoe Rental*, we set our sights for April of 2024. We ended up catching a lucky break as the weather and river conditions were as perfect as they could be. Boats loaded with food and gear, we set out from Rush down a remote and pristine stretch of the river rarely seen by most visitors. We knew this was going to be a good trip. But we really had no idea of the soul-feeding masterpiece of a float that lied ahead of us.
* This article and YouTube video is not a paid sponsorship. We received no financial incentive from Crockett’s Canoe Rental.
Quick Glance
Distance – Rush to Cartney Access: Approximately 27 miles
Distance – Rush to Buffalo City: Approximately 24.5 miles
Difficulty: Moderate
Rush Landing Coordinates: 35.642780, -93.728060
Cartney Access Coordinates: 35.642780, -93.728060
Clabber Shoals: 36.12698, -92.54497
“Eagles Nest” Night 1 Campsite: 36.10741, -92.52118
Big Creek Confluence: 36.07935, -92.47287
Bear Hollow: 36.09861, -92.45190
Leatherwood Creek: 36.109462, -92.429542
Night 2 Campsite: 36.111813, -92.429869
Elephant Rock: 36.136327, -92.428446
(Copy/Paste Coordinates into GPS or Google Maps search bar)
Directions
I do not recommend self-shuttling for this float. The fastest drive between Rush Landing and Cartney is 1 hour 11 minutes each way. That’s an hour that I would much rather spend on the river. I highly recommend using an outfitter to shuttle your vehicle to Cartney and help you get to the put-in at Rush.
Rush Landing is located halfway between Harriet and Yellville on the north side of the Buffalo River. From Hwy 14, head east on Marion County 6035. Follow this road until it dead-ends at Rush Landing. You can’t miss it. If you do, put your life jacket on because your car is now in the river.
Getting to Cartney Access is not as easy. There are so many twists and turns that the best way to get there really depends on where you are coming from and which way you want to go. So I won’t try to list all those here. Simply drop the coordinates above into a GPS and navigate yourself there. I will say that you’ll need to take Shipps Rd off Hwy 341 between Norfork and Big Flat. And along Shipps Rd, you’ll have to ford two shallow creeks. They are not deep and 4-wheel drive is not needed. But decent ground clearance is recommended. Cartney Access has a nice parking area and loop to turn around. It is an Arkansas Game and Fish public access with a nice, wide concrete launch ramp.
What to Expect
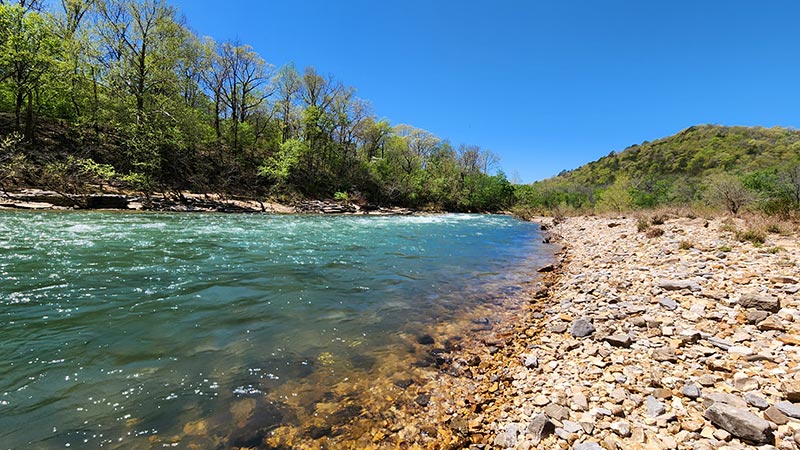
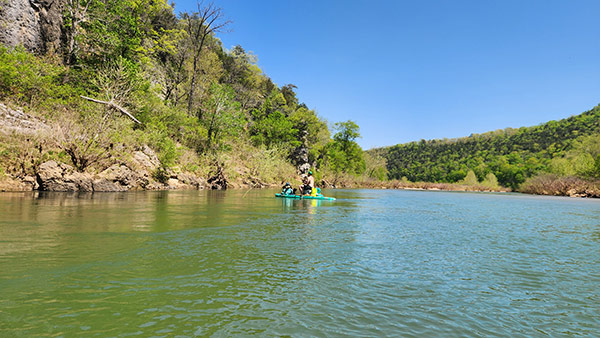
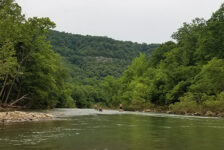
This overnight float starts at the historic community of Rush, the gateway to the Lower Buffalo Wilderness. I was expecting the river to be much wider here, with lots of shallow sections and flat water. I expected the terrain to be flatter, with fewer big bluffs and rock formations. We all expected a slower float with quite a bit of paddling. I was wrong – way wrong. Leaving Rush Landing, the river winds through a tapestry of vibrant green forests and towering bluffs. The current carries you past hidden waterfalls, secluded hollows, and sandy beaches, each offering a chance to soak in the pristine beauty. This section of the Buffalo River is also home to some world-class smallmouth bass fishing. Read on to see how the float and scenery completely exceeded our expectations.
The Float
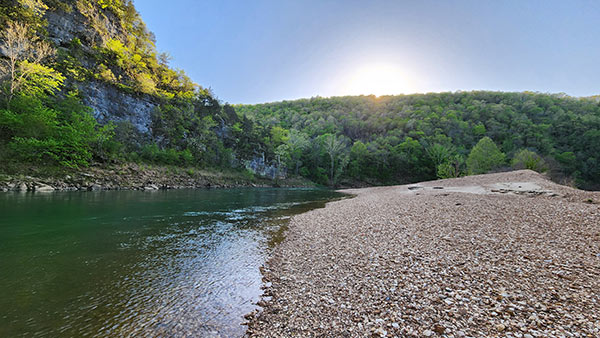
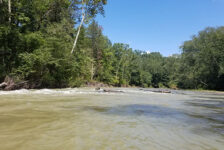
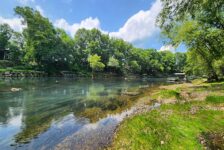
Rush Landing to the White River (at Buffalo City) is a 24.5 mile float with no take-outs in between. The duration of this float depends on the flow of the river. For our float, the Hwy 14 gauge read 5.08 ft at 1950 cfs. At this level, we had great flow and hardly had to paddle at all. We finished the float in a total of around 13 hours of actual float time. So we could have done this in two days and camped one night. But we wanted to camp two nights, so we took our time. We stopped often, set up camp early, and did not rush to start the next day. At lower river levels, the flow will not be as fast, more paddling will be required, and it could take up to 2.5 days. Most people that do this float take out at Buffalo City on the White River. Instead of fighting the current to reach Buffalo City, we dumped into the White and floated 3 more miles down to Cartney Access. This is a little bit longer float, but an easier shuttle for our outfitter. The take-out is featured in our video further below.
Difficulty
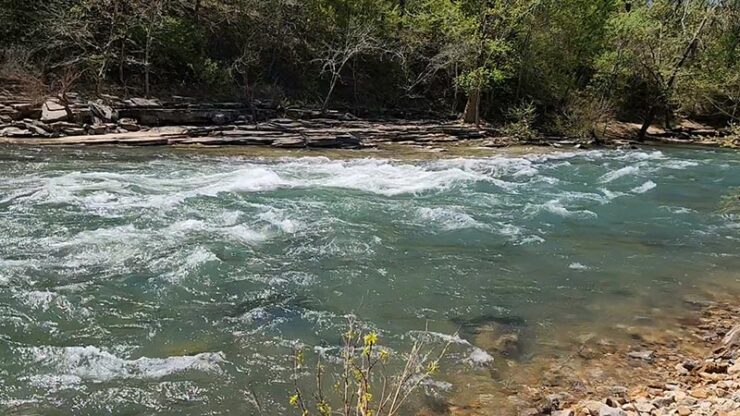
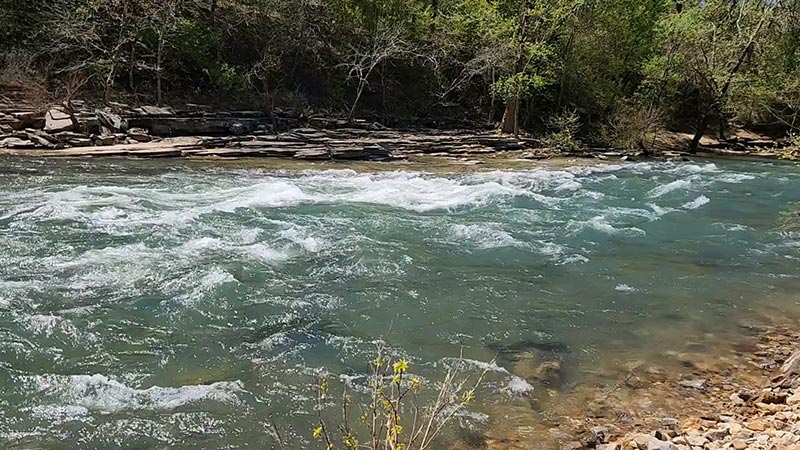
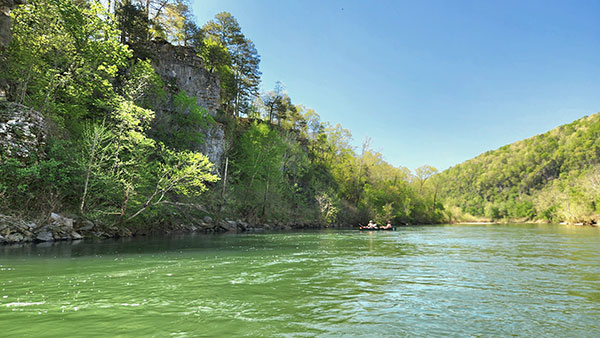
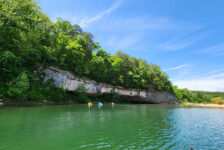
As far as difficulty goes, this is mostly an easy float. There is one rapid section in the first mile that needs your full attention. Leaving Rush Landing, Clabber Shoals awaits just around the first turn. In low water conditions, Clabber Shoals is very runnable down the left side. But when the Hwy 14 gauge is at 4ft or more, Clabber Shoals can be pretty sketchy. And above 6ft, I absolutely recommend portaging around it. You have to portage on the left side. Having never seen it before, we played it safe and carried our gear and boats 150 yards downstream to the end of the shoal. This is featured in our video further below. Now that I’ve seen it, I think I could have made it. In fact, David – who arrived later and caught up to us – DID make it through on his paddleboard. But there’s nothing wrong with a safe play and potentially saving your gear. After all, it’s 25 miles before you can take out!
After Clabber Shoals, the rest of the float is smooth sailing. The flow was much better on this end of the river than I expected. And there were more fun rapids and shoals than I thought there would be. Nothing crazy, just enough to keep it fun. At the level we had, it’s definitely a float you can kick back, steer, and enjoy the cruise.

Scenery
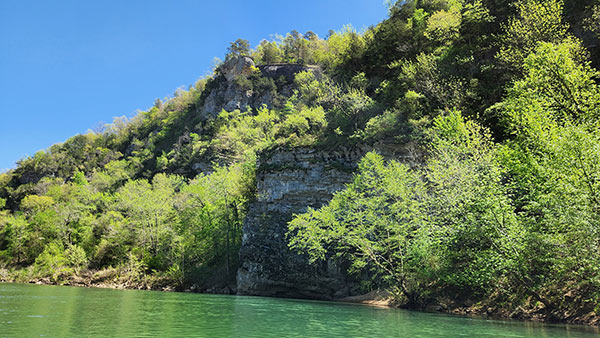
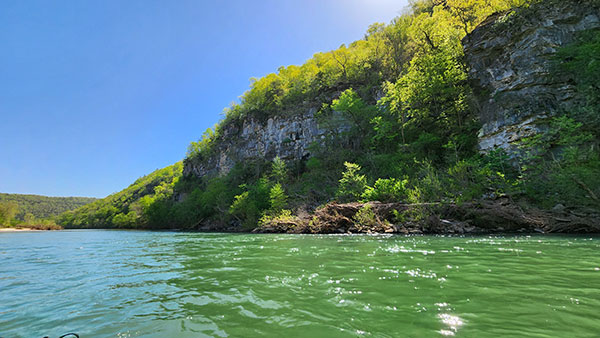
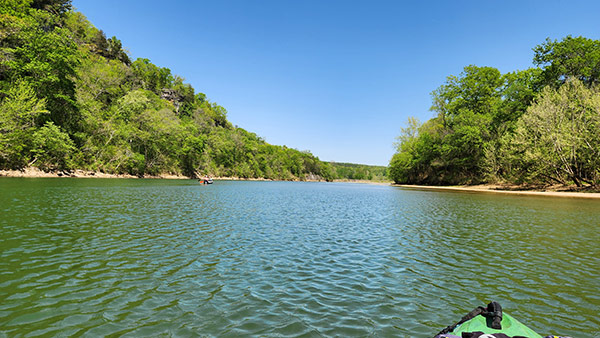
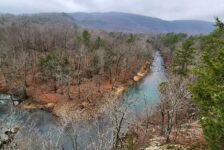
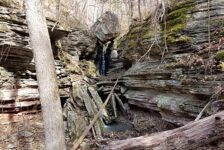
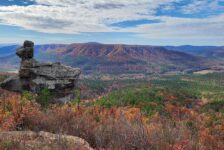
I don’t know why, but I was not expecting Rush Landing to the White River to be as scenic and pretty as other parts of the Buffalo. Boy was I wrong! The same beautiful scenery you can see from Maumee to Rush continues down this stretch of the river. I was blown away by some of the massive bluffs we saw on this float. The bluffs along Bear Hollow look like something out of a western movie. And the many un-named bluffs, including the two we camped by, provide the perfect backdrop to the emerald green waters of the Buffalo. But the main attraction on this stretch is catching a view of the iconic Elephant Rock bluff.
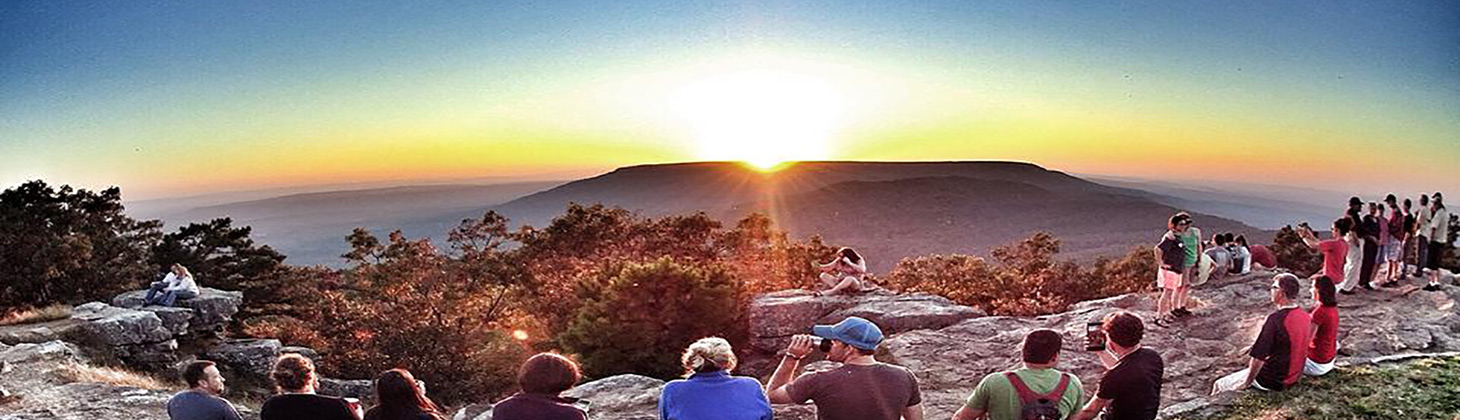
This section of the river is truly a photographer’s dream. Prepare to be awestruck by towering rock formations, hidden waterfalls cascading down moss-covered cliffs, and vibrant wildlife all around. Keep an eye out for deer, otters, and even the occasional bald eagle soaring overhead. We saw quite a few eagles throughout the entire float, and even had four of them nested across from our night one campsite! Perhaps the best part is the quiet tranquility of this remote region. Watching the river bed speed by below you as you cruise through the crystal clear waters of the shallow shoals. Or paddling through the emerald green pools with nothing but the sound of birds and rushing water to break the silence. If you paddle with a group, I highly recommend dropping back on your own for a while to soak up the calming sounds of nature.


Tips For An Overnight Float
There’s nothing quite like watching the sun go down over the river bluffs to the west with a raging campfire. Or waking up with the sunrise over the eastern hills. But an overnight float takes some careful preparation. You don’t just wake up one day and decide to go. It takes a little planning and the proper gear. I get into this in my first overnight float article here here, but I’ll expand on that below. (Yes, I’m recycling the sections below from my Maumee to Rush article. Because I’m efficient like that.)
Gear
Space on your kayak is limited, so it is essential to pack light and efficiently. Weight is also important. The more weight that’s on your boat, the less stable it is. Food and drinks are top priority. Decide how much room you need for that, then figure out from there what gear you can take. Next on the list is either a tent, or hammock and tarp. If it’s still cold, you’ll need a sleeping bag. What cooking supplies do you still have room for? Check our paddling gear list to make sure you’re not forgetting anything. Finally, you will need a large dry bag. Keep dry clothes, a towel, and some food in there.
To save space, you might have to get creative. One thing I do is treat it like an overnight hike. I use my backpacking gear because it is compact and saves space. I used to pack it in my hiking backpack and drop that into a giant trash bag to keep it dry. Now I use the Remote Designs 60 Liter Dry Duffel. I highly recommend finding a bag like this to keep your gear dry and easy to carry. Arrange your gear in your kayak at home to make sure it will fit. If not, coordinate with your group on things you can share so you don’t all bring the same thing. (You only need one camp stove, certain cooking supplies, etc). Hopefully someone in your group will be rocking a canoe or standup paddle board. You can pack a lot in one of those which allows for a few more luxuries. For ideas on arranging gear on your kayak, see my video below.
Packing
If your kayak has any dry storage, try to put as much as you can in there. But anything you’ll use often (sunscreen, coozy, etc) should be left out where you can easily access it. Put the rest in your dry bag and coolers, and strap or bungee those down. The night before the float, I prep as much food as I can. I dice veggies for Day 1 dinner and put them in a foil pack. I brown sausage and scramble some eggs and foil pack those. Then I can just throw these packs on the fire or camp stove.
Food is important. It does you no good if it’s spoiled or waterlogged. So it needs to stay cold and dry until the end. You’ll figure out your system, but here’s how I do it. I have a 3-day cooler packed with frozen water bottles. Large chunks of ice last longer than small ice cubes. These double as drinking water. Day 1 Dinner, Day 2 breakfast and lunch, and drinks go in this cooler. All food and foil packs go into ziploc bags to keep them dry. I do a bottom layer of frozen water bottles. The next layer is Day 2 lunch and breakfast and some bagged ice. A few more frozen water bottles on top of that along with some drinks. And then Day 1 dinner with more bagged ice on top. Pack it completely full, filling all spaces with bagged ice. Less air in the cooler helps your ice last longer. Leave this cooler CLOSED as long as possible. Then pack a small cooler for Day 1 lunch and drinks so you don’t have to open the main cooler. For multi-night trips, look into using dry ice.
Picking a Camp Site
When it’s time to find a camp site, there are some things to keep in mind. First, camping on the river banks is not allowed within 1/2 mile upstream or downstream of a Buffalo River NPS campground. So it’s a good idea to know where those are. Next, I recommend finding a spot where the river is moving fast. Stagnant water attracts mosquitos, and you don’t want that. Plus the sound of rushing water is great for sleeping. Speaking of sleep, If you are hammock camping, look for a spot with trees that can hold your hammock up. And speaking of trees, shade can be pretty handy. So consider which direction the sun will set and rise, and where your shade will be.
Here’s the most important thing, so please read this. Choose a site that allows you to escape to higher ground if the river were to rise overnight. Hopefully you watch the weather and choose a sunny weekend. But sometimes the weather folks get it wrong and storms pop up out of nowhere. Even if the storm isn’t right over you, a storm upriver, can cause the river to rise on you. The Buffalo can rise to dangerous levels very quickly. Yes, it happens. And yes, people have paid dearly for it. With that in mind, island gravel bars in the middle of the river are a bad idea. So is camping next to a large bluff. Being trapped between a rising river and a large bluff is not ideal. So pick a spot where you can get to high ground if necessary.
Plan Your Trip
The great thing about floating Rush Landing to the White on the Buffalo River is that it’s almost always floatable. But it’s still a good idea to check the river level on American Whitewater. They say the ideal float range is 2.2 – 10.0 ft on the Hwy 14 gauge, but I disagree. Always go with what the local outfitters say. And in this case, Crockett’s Canoe rental suggests that 2.5 ft is the minimum for a good float. (there will be some dragging and paddling at this level.) They also tell me that anything above 6 ft will be quite dangerous at Clabber Shoals. Even at 5 ft, we chose to portage that rapid. Another thing to consider for this float is the weather. There are no take-outs, so if you don’t want to float or camp in a storm, you better choose a time when the weather forecast is ideal. Because once you’re in, you’re in for the long haul. As I mentioned, I recommend using an outfitter to shuttle this one. And I would use Crockett’s Canoe rental due to their location. But also because they are fantastic people and a lot of fun to work with. I also recommend planning this float during off-peak times to make it easier to schedule that shuttle. But if you do self-shuttle, get an early start because there will be a lot of driving.
If you need anything from town, Yellville is the closest one to Rush. You might want to study the Buffalo River map (choose the Brochure Map option) or Google Maps to get familiar with some points of interest along the river. It’s a good idea to take a GPS or have a GPS app on your phone, and save some waypoints. You’ll want the take-out at Cartney marked for sure because it’s easy to miss. But also mark a few checkpoints to know how much progress you’ve made and how much ground you need to cover per day. With that in mind, don’t forget to pack a couple of power packs to charge your phone. Not just for GPS, but also for the pictures you’ll want to take!
Cell service in this area is spotty at best. In fact, I had no service at all (AT&T) on the second half of the float. Dogs are allowed on the river but glass is not. NO GLASS of any kind! Remember your PFD and trash bag, and please do your part to leave no trace. If you need overnight accommodations before or after the float, there are tons of cabins in the area for rent. Crockett’s has a good list of those to get you started here. Watch the weather and water levels, and be safe out there. See ya on the river!


Gina and Matt Booth
A better quicker out is Riley’s right across from the White River confluence. $5 a day parking. No cell phone reception. Most other blogs recommend that. And yes to full-stop caution about Clabber rapids shortly after Rush put in. Or you’ll loose critical gear. Weighted down boats full of gear and provisions are much harder to maneuver . .
Scott Hallmark
Hi Gina! Thank you for your comment and feedback. I agree that for some people the take-out at Riley’s may be a better option. It is shorter for sure. There are some situations where Cartney would be more appropriate. It just depends on circumstances. For example, if they are generating hard at Bull Shoals dam and the current is really strong, it can be a challenge for some folks to get across. It is VERY easy to just dump into that flow and float on down to Cartney. It also depends on someone’s shuttle situation. For us, it was going to be much easier and cheaper for Crockett’s to shuttle our vehicle to Cartney. And we really didn’t mind the extra river time on the White. It will be different for everyone. Since most people already know about Riley’s/Buff City, I was just offering an alternative that doesn’t get talked about much. Thanks for reading and commenting. Appreciate you!